NTS messages in Emacs

Passing messages via the ARRL National Traffic System (NTS) has recently caught my fancy.  If you don’t know anything about it, you should take a look at the NTS page on the ARRL website.  In short, it’s a network of hundreds of ham radio operators that tirelessly meet multiple times each day on local, regional, state, and transcontinental “nets” (conference calls on the radio) to pass traffic around.

Back before email and unlimited long distance, you could go to your neighborhood ham and give him a message for your mother across the country.  That ham would insert it into the system and all the hams in between would pass it along until it reached the proper area, at which point a ham local to the recipient would deliver it in person, by mail, or phone.  Nowadays there is not much real traffic to pass, but all the involved radio operators still meet multiple times a day, 365 days a year to practice and keep the system oiled and working.  If we were to ever be set back to the stone age (communications-wise) the hams would be ready to pass a large volume of messages.

Anyway, it’s very important to be able to copy down the message into the proper form, which is an ARRL radiogram.  You can certainly do that by printing hundreds of those forms and copying by hand, but that gets wasteful and is hard on your writing hand (I type much faster than I write).  For a while, I was copying the messages into a plain text file and then quickly counting the words for the checksum manually, but decided that was rather silly.

So, I decided to see if I could write something in elisp to help me out.  I’ve never written anything like a major mode or user interface, so it was a learning experience.  I was successful in writing nts.el, which gives me a fillable form that helps correct the format, validates the checksum, and records the received and sent timestamp automatically.  It also helps me manage the messages by keeping them organized into “Active” ones that need to be passed along and “Completed” ones that have been handled and need to be archived.  It looks like this:


I don’t expect there are many Emacs users that also participate in the NTS system, but if so, feel free to take a look at the code.

Posted in Radio

ID800 Magnetic Head Modification

The ICOM ID-800 is a very common D-STAR radio, and for good reason: it includes the digital functionality, dual-band operation, and a remote-able head.  It’s much easier to mount a small head unit in view than an entire radio, with all the antenna and data cabling that is required.  In my Jeep, I have the ID-800 base unit under the driver’s seat, bolted to the floor, with all the cables neatly run under the carpet from the various places (antenna, battery, GPS).

Until recently, I had the head mounted with some industrial-strength adhesive velcro to the center of the visor trim panel.  There was a nice blank spot there and it’s a good location for the head, visibility-wise.  Unfortunately, ICOM does not make (or no longer makes) a mounting plate for the radio, which means you’re pretty much stuck with some sort of adhesive mounting solution.  This is bad for many reasons, but most notably:

  1. The head won’t fit back on the base of the radio with the velcro (or the messy gook the adhesive leaves behind) in place
  2. Nobody wants to glue stuff to a $500 radio
  3. In the summer, almost any adhesive that will be removable down the road will turn to grape jelly in the heat of the summer

In fact, point three in the above list is what drove me to make a change.  I had replaced the velcro once already this summer, and didn’t feel like making the process a twice-yearly event.

In the newer radios, ICOM has made a huge improvement: magnetic head units.  By affixing magnets to the back,all you need to do is mangle a piece of sheet metal into place and stick the radio to it.  When you want to move it, you need only tug it out of place.  No gook, no mess, no problem.

So, while I was chiseling the latest batch of failed grape jelly off of my ID-800’s head this weekend, I decided to see what I could do to make my unit magnetic.  In order to qualify as an improvement, I set the following criteria:

  1. It has to be a clean modification, such that it looks reasonable and is worthy of sale someday
  2. It has to be adhesive-free and gook-free
  3. It has to allow the head to be mounted back on the base unit, should that be necessary someday

What I came up with met all three and is a major improvement, in my opinion.  Note that this may void your warranty, destroy your radio, and/or wipe your hard drive (the magnets are strong).  However, it’s pretty mild and works well for me.

First, I opened up the head.  I was surprised and pleased to find that ICOM used actual screws to hold the unit together instead of explosive plastic clips like most of the junk nowadays.  Here’s what it looks like inside:

Note all the extra space in the back cover.  It may be hard to see in this picture, but it’s actually quite roomy back there.  I went to Surplus Gizmos hoping to find some of the uuber-small uuber-strong rare earth magnets that look about like a watch battery.  Unfortunately, they didn’t have any of those, but they did have a big pile of strong kidney-shaped magnets from hard drive motors.  They looked like this:

  The backing plate isn’t really part of the magnet, the two small kidney-shaped things are where the power is.  The magnets themselves will happily separate from the plate and are quite thin.  Their outline is larger than I wanted, but they worked out.  I pulled a bunch off and loaded up the back cover with them:

 Now, you’ll notice that I have the cover sitting on a piece of sheet metal.  These magnets are so strong that they will literally jump across the cover to mate with each other.  The sheet metal gives them something to pull on below which helps keep them in place.  It took me several minutes to get these to sit flat in the cover, which is rather frustrating.

The magnets are covered in metal, so I wanted to make sure I insulated them at least a little bit from the board they would be facing from the front half of the control head.  Since this part won’t be seen, once it’s together, I cheaped out here and cut some thin receipt paper to cover each magnet:

 Just enough to insulate each magnet.  The receipt paper is very thin and didn’t present an issue cramming it in there.  Finally, I needed a way to keep the magnets in place so they didn’t wander out of their places when vibrated.  I could have used (and may go back and use) some heat-tolerant glue like epoxy to affix the magnets in place, but this was an experimental thing and epoxy is very permanent.  At this point, I could probably put the head back together in such a way that the warranty department wouldn’t notice or care (unless there was an issue with the head itself).  Epoxy eliminates that ability forever.  Anyway, I could have done just about anything here, but opted for some cotton.  The cotton won’t turn to gook and is relatively inert and harmless, but provided enough tension to hold things in place.  It’s just what came to mind first.

Anyhow, I screwed the case back together carefully to avoid the magnets jumping out of their places until under pressure.  After it was all secure, the head is very magnetic from the outside and is more than strong enough to hold itself in place on a piece of sheet metal.  I’ve got a metal mount bent into place in the Jeep, and the head is now stuck there by the magical force itself.

Posted in Hardware, Radio Tagged ,

The view is better from up here…

Since our recent trip to the Tillamook State Forest OHV area with the Jolly Jeepers, a suspension lift for my Jeep has been on my mind.  Wednesday of this week, I dropped it off at Leonard’s Off-Road and got it back later that evening.  Here’s a picture of what it used to look like (from the back):

…and here is what it looks like now:

I didn’t have a good side-front picture of the before, but you should be able to get an idea of the change.  Leonard did the following:

  • Installed a Rubicon Express RE7000 4.5″ suspension lift
  • Mounted BF Goodrich LT305/70R16 M/T KM2 tires on AEV 16″ Bridger wheels
  • Installed a custom-made CV rear driveshaft
  • Installed a spare tire relocation mount

The Jeep is significantly higher now, but handles surprisingly well given the change.  You can definitely tell the difference when you hit a bump at road speeds, but it’s much more rigid than I would have expected.  Hopefully we’ll have time this weekend to go try it out in the dirt!

Posted in News Tagged

Roku Player

I recently received a Roku Netflix player as a gift.  I have always been skeptical of the Roku player and the quality of the picture that they could possibly deliver over someone’s network connection of unknown quality and load.  When they recently announced a player update with HD output, I figured that they must be delivering some high quality content.

I have only had it about a week, but so far I’m impressed.  There seems to be a few video encoding levels in use by the Netflix folks and I’m happy with all but the lowest.  Some video content is pretty grainy and suffers during fast panning of the camera.  However, most of the stuff I’ve wanted to watch thus far has either been higher quality standard definition or in HD.  I must say that although the HD programming doesn’t compare (in quality) to what I get over cable or from a Blu-ray disc, I’m quite impressed with how good it is.  The box has HDMI and Component outputs on the back, both of which we have tried.  The HDMI is clearly better, but the component is definitely usable.

I’ve done a very small amount of inspection of the network traffic so far and hope to do more.  During a buffer fill, it will pull between five and ten megabits of data from the server, cycling as it plays of course.  I don’t know what the minimum sustained speed is, but their site claims it is only 1.2Mbit with a recommendation of 5Mbit.  So, if you’re on old DSL you probably won’t be very happy with it, but anyone with a decent cable modem (or better) should be okay.

I tend to think that there must be some interesting (read: undocumented) things you can do with the device, but I haven’t seen much mentioned in a few google searches.  I did port scan it and I see the following open ports:

PORT     STATE SERVICE
8080/tcp open  http-proxy
8083/tcp open  unknown
8084/tcp open  unknown
8085/tcp open  unknown
8086/tcp open  unknown

Connecting to 8080 returns some sort of command-line interface, but the only command I’ve seen it respond to is “quit”.  Definitely some more inspection is needed there.

The only other thing I should comment on is the setup procedure.  I haven’t tried to connect it to my encrypted wireless network, but all the other tasks required to get the device working were superbly engineered.  The device boots up the first time, presents you with a short Netflix URL and an activation code.  You log in to your Netflix account, type in the code, and the service links your player and account.  Well done guys.

So, in summary, I highly recommend the player.  For $99 you can’t really beat the price, and if you already have a Netflix account, you’re missing out on an otherwise free service!

Posted in Hardware

2009 Jolly Jeepers “Back to Basics” Rally

This past weekend, Taylor and I packed up a bunch of camping gear and headed down highway 6 towards Tillamook.  Our destination was the basecamp for the 2009 Jolly Jeepers “Back to Basics” Rally.  This annual gathering of off-road enthusiasts brings people from all over to the Tillamook State Forest’s OHV recreational area for two days of fun.  This was our first time, but definitely won’t be our last.  We had a lot of fun, met some nice people, and definitely committed ourselves to return next year.

We took our 2006 Jeep Unlimited Rubicon, still in mostly stock form.  Everyone assured us that we would be surprised what it would do in its showroom configuration and they were right!  We crawled over some crazy rock obstacles, snaked through dense bits of forest, and climbed steep and rocky slopes.  The pictures don’t come close to conveying the extreme nature of the trails.

We quickly became aware of what a few inches of suspension lift and larger tires would do for you.  We also came to appreciate even the stock rocker guards and recently-installed rock-crawling bumpers.

While I certainly didn’t do everything the trails had to offer, I did almost all of the trails that the big boys did, and a couple of the obstacles.  At the end of the second day, we came to a trail rated three black diamonds and labeled “severe”.  I wasn’t about to venture down there, so I took the bypass with several others and then hiked down to the main obstacle to watch.  An impressive show was waiting for me, where an XJ (one of my all-time favorites) was making it up a killer hill.  I grabbed just a small bit of video of the trouble spot and it’s truly amazing, IMHO:

Posted in News Tagged

Field Day 2009

The ARRL Field Day 2009 contest was this past weekend and I had quite a trip.  The point of field day is to get out of the house and operate the radio on emergency power out “in the field”.  It’s good practice for setting up antennas, radios, and power systems in strange places so that you’re ready if you ever had to do it during a disaster.  The goal of the contest is to talk to as many stations as possible, mostly in the US and Canada.

This year, I went out to a 20-acre plot of land outside of Sherwood that we were allowed to use.  I camped there for two nights with N1KEZ, N7AAM, and KX7YT.  We had a blast setting up two G5RV wire antennas and two 20-15-10 meter yagis.  The group has access to some really incredible equipment and so we were able to secure one of the yagis and the ends of the wire antennas to a 70′ boom truck:

Another treat was the use of a 1960’s era US Army 40′ field mast.  This is an incredible device that is small, light, easy to set up with two guys, and gives you a 40′ tower in about an hour.  The tower assembles from 5.5′ tube sections that go into a elevator and clamp mechanism making it really easy to shoot it up:

 
 We set up all the radios and computers in a portable shed that N1KEZ brought.  This gave us a place out of the sun to operate and turned out quite nice.  Most of us ran our radios directly on the battery the whole time and we used an Honda EU2000 generator for the computers and other equipment. 

 About 1300 on Saturday, Taylor joined us with lunch.  She recently passed her General class exam (thus gaining HF privileges) and made her first contact on HF to South Dakota on 20m sideband.  She and I used her callsign, K7TAY, for the event and operated as the GOTA (Get On The Air) station for the group.  We made 44 contacts between the two of us,which I believe puts the group’s tally over 300.

We had a blast, ate lots of good food and made a lot of contacts.  The camping was excellent, even without the radios.  Being on a 20 acre plot with nothing but friends and trees was quite a treat.  We left our ground rod in place, optimistic that we’ll be able to come back next year and do it again!

Posted in Radio

Embedded D-RATS

For a while now, I’ve wanted to see what interesting things I could do with a microcontroller by teaching it how to send and receive D-RATS packets.  I bought an Arduino Diecimila a while ago and played with it a little bit.  It’s a really cool device and makes quick work of getting a working microcontroller programmed and functional.  I highly recommend it.

When I first got it almost six months ago, I got stuck on level conversion to RS232, which I needed in order to interface with a D-STAR radio.  I had a MAX232 chip and four properly-sized capacitors hooked up according to the spec sheet but it just wasn’t happening.  I got frustrated and put it on the shelf.

Recently I decided to give it another go, and sought some advice from someone with more hardware skills than I.  Eric boosted my confidence by sanity checking my plan and suggested that perhaps I had a bad capacitor from Radio Shack.  I was a little skeptical, but ordered some new ones from a more reputable source.  The new ones arrived a couple days ago and I’m pleased to report that they fixed me right up.  Wahoo.

Along with the new caps, I also ordered some additional components I needed to create a semi-permanent setup.  While shopping around, I found the Arduino Pro Mini, which is an unbelievably small unit with nothing but labled solder tabs.  The size was just too attractive to pass up, so I got one of those too.

After getting the MAX232 prototyped on a breadboard with the new caps and proving that it worked, I set out to make a little board that had the Arduino on it (using headers so I could remove it for reprogramming), the MAX232 and associated capacitors, and a substantial 5V regulator so I could power it off of 15V (the Pro Mini has an upper limit of 12V which is too low for operation in a vehicle with a good alternator).  Below is what I ended up with:


It’s a little hard to see, but the Arduino is in the foreground sitting atop the headers.  Under it is the 5V regulator and in the background is the MAX232.  The wires off to the left go to a male DB9, suitable for attaching to a D-STAR radio’s data cable.  In all, there is less than $30 on the board.  For a size reference, here is the unit next to a normal SD card:


It’s extremely small so it should be easy to mount in an enclosure and tuck in the car near my radio.

Right now the firmware has just a ring buffer large enough to capture a D-RATS ping request.  It will reply to KK7DS E or a CQCQCQ ping.  Even in this basic form, it’s pretty neat to be able to ping a moving vehicle and get a response without requiring a running PC in the car.  However, I have a lot of ideas for neat things to add:

  • I have a serial 16×2 LCD display that could be used to display chat and status messages
  • A keyboard or keypad could be added to allow two-way messaging with a very small device
  • Adding a GPS would allow the unit to respond to postition report requests as well as replace the ability to do GPS beaconing
  • Creating some new D-RATS RPC commands would allow a remote station to control the DIO pins to illuminate LEDs, throw relays, or control just about anything
  • Adding a temperature (or other type of) sensor could provide status readings from a remote station with minimal hardware

So, there’s a lot of room for cool stuff to add!


Posted in Hardware Tagged

D-RATS covered in the D-STAR Nifty Guide

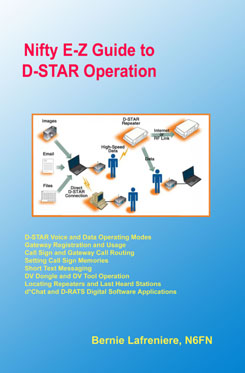
The “Nifty! Ham Accessories” company publishes a large number of quick reference guides and manuals for a variety of ham hardware and software.  I think the most popular items are the nifty guides which are pocket-sized cheat sheets for today’s complex radios.  Recently, the “Nifty E-Z Guide to D-STAR operation” was released as a small paperback book.  It covers a wide range of D-STAR topics such as programming the radios, using repeaters and gateways, as well as operation of the DV dongle.  I was happy to hear that D-RATS was mentioned in Chapter 8, titled “DV Mode Slow-speed Data”.


The author covers the basic steps to get a D-RATS station configured and on the air, as well as the highlights of various bits of functionality, including beacons, file transfers, and networked operation.  If you’re a hard-core D-RATS user and are plugged into the new 0.3 beta versions then the screenshots will look a little dated since the book (obviously) covers the currently-released version.  However, if you’re an average user looking for a good reference guide to keep by your rig, this will cover all the basics and could prove quite valuable as a last-minute D-STAR/D-RATS refresher.

Check it out!

Posted in Radio Tagged

Dayton Hamvention 2009

The weekend before last was the 2009 Dayton Hamvention.  I’m a week late crafting this write-up because of some work-related travel that came up unexpectedly last week.  It was a good show, but it seemed clear that the poor economy had taken its toll on the attendance.  Luckily the level of interest in D-STAR has increased since last year, so there was a higher relative concentration of people interested in D-STAR and D-RATS than before.  As a result, I still had a fairly large amount of traffic and questions.

D-RATS had a much larger presence this year than last, with a large booth on the arena floor:

D-RATS Presence at Dayton 2009

 There were four computers, one on each end connected to a large display screen and two in the middle for hands-on demonstration.  The right-most machine was connected to the internet and the ratflector for most of the show, which allowed people to chat with foreign stations and see their positions on the map:

D-RATS ratflector demo

I was also really glad to have a few visitors from back home, some of which manned the booth for me so I could get out to see the rest of the show:

The group from Washington County

 From left to right: Rob N1KEZ, John KX7YT,myself, and John N7AAM.

Update 27-May-2009: I forgot to post a link to the D-RATS flyer that was available at the show.  You can get the PDF version here.

Posted in Radio

Jumping to the inbox in GNUS

I’ve used GNUS to read my mail for a long time now.  Every once in a while I try to move to something else because of simplicity or ease of use, but I always come back.  The unparalleled ability to customize and script the environment is just really hard to beat.

The “resting state” in GNUS is the group buffer, which shows you (by default) only groups that have unread messages in them.  I like this a lot as it provides a sort of dashboard to the mail items that need attention.  However, if I need to recall an already-read message, I have to hit L to show all groups, and then search (because I have a lot) for the appropriate group and then enter it to find the message.  This isn’t a huge hassle, but sometimes I get annoyed at the process.

Since 90% of the time, I’m recalling messages from my inbox, I decided to write a function that would make this common case quicker.  I came up with the following bit of elisp:

(defun dan/select-inbox ()
  “Select inbox”
  (interactive)
  (save-excursion
    (gnus-group-list-all-groups)
    (if (search-forward-regexp “mail.*misc” (point-max) t)
    (gnus-group-select-group))))

Assuming I’m in the group buffer, I can run this function and it asks me right away how many messages I want to view from my inbox.  Naturally, I want a quick key sequence to trigger this function, so I chose the unused “G i”keys for “Group…Inbox”.  I bound it thusly:

 (define-key gnus-group-group-map “i” ‘dan/select-inbox)

Now from inside the group buffer, I can hit “G i”, type “10” (or so) and quickly recall recent messages.


Posted in Codemonkeying