
I recently installed GenRight regular aluminum front fenders on my TJ. It was my first time doing fenders and it turned out to be a lot more than I was planning for, so I thought I’d document some of my notes here for anyone else that might be wondering about the process. I’ll also include some thoughts on GenRight and the fenders in general.
First off, I called GenRight before I ordered, asking for the install instructions ahead of time. I hate when companies don’t just publish these on their site, both for pre-order information, but also because I want to maintain a PDF copy long-term and refer to that during install. They were super nice on the phone and assured me that the install was very easy if you also go with their inner fender liner (which I wanted anyway). They did email the instructions after the call, but they were the wrong ones (for the hi-fender instead of the regular). But, I figured they’d be pretty much the same, minus the cutting of the hood and ordered.
The shipment came super fast via FedEx, which was awesome. Seems like most places have a lead time measured in weeks. I was, however, not impressed that some of the pieces were missing instructions, and some had the wrong instructions included. I ended up getting all the right PDFs from them after a second call, including other things they had said would be included, like a template for trimming my existing sliders. The guy on the phone noted that “oh by the way, the instructions don’t mention that you need to find a new washer bottle because the old one won’t fit.” That was the first indication that the instructions were vastly under-documenting the process. I think that keeping the stock inner fenders would have been massively easier (although I’m glad I now have flat surfaces under the hood for mounting new things).
The other thing is, even after I got the right instructions from them, they clearly were written years ago and the actual products I received had been revised since then. I can guess at how stuff goes together as good as the next guy, but I assumed that for the price premium I’d be getting instructions that matched the stuff I ordered.
So, I’m disappointed in the instructions and lack of communication of all the details involved. Obviously I’m happy with the outcome and the quality of the actual product.
Install Notes
Don’t even bother trying to get the old fender off and the new fender on with the sliders in place. I did get one side off and did a little fitting of the new fender, but ultimately removed the sliders for most of the job. Mine are two-piece JCR sliders, so that was more work than otherwise. Also, plan to remove not only the battery tray, but also the mounting bracket (on both sides!) for initial fitment. In fact, plan to mount and un-mount pretty much everything a couple hundred times.
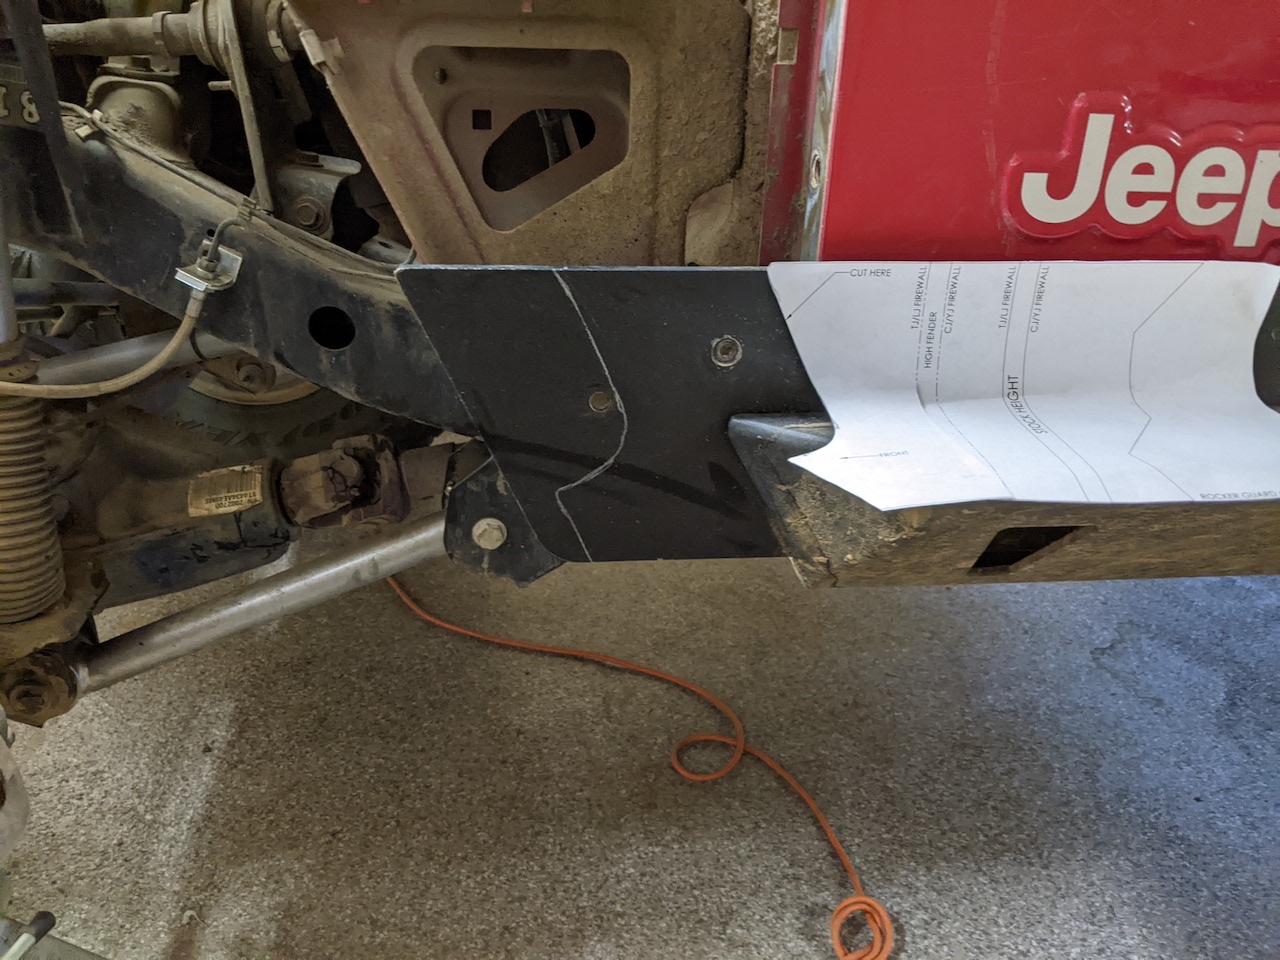
The template they gave me for trimming the sliders was helpful, but it wasn’t clear exactly where to line up the “TJ Firewall” line, since the firewall is a stamped piece of steel that isn’t remotely flat. I went conservative and ended up cutting multiple times for clearance. I used a plasma cutter with the slider on the vehicle and then traced that side to the other side when I had it right. My sliders had a bolt that went through the front fender, which was still in a good place to bolt through the GenRight fender, so I did that.
When fitting the fender, the front clip needs some coaxing to line up with the bolt holes. There is almost not enough clearance inside the front mounting area of the fender to even line up the bolts. I initially used a long philips screwdriver to move the front grille into place, but ended up boogering up threads. The proper procedure is to get the bolts on the front started and then move the body-side of the fender into place since you effectively have a big lever to work with at that point. Plan to use an open-ended wrench on the front bolts with 1/4 turns for ages to get them fully seated.
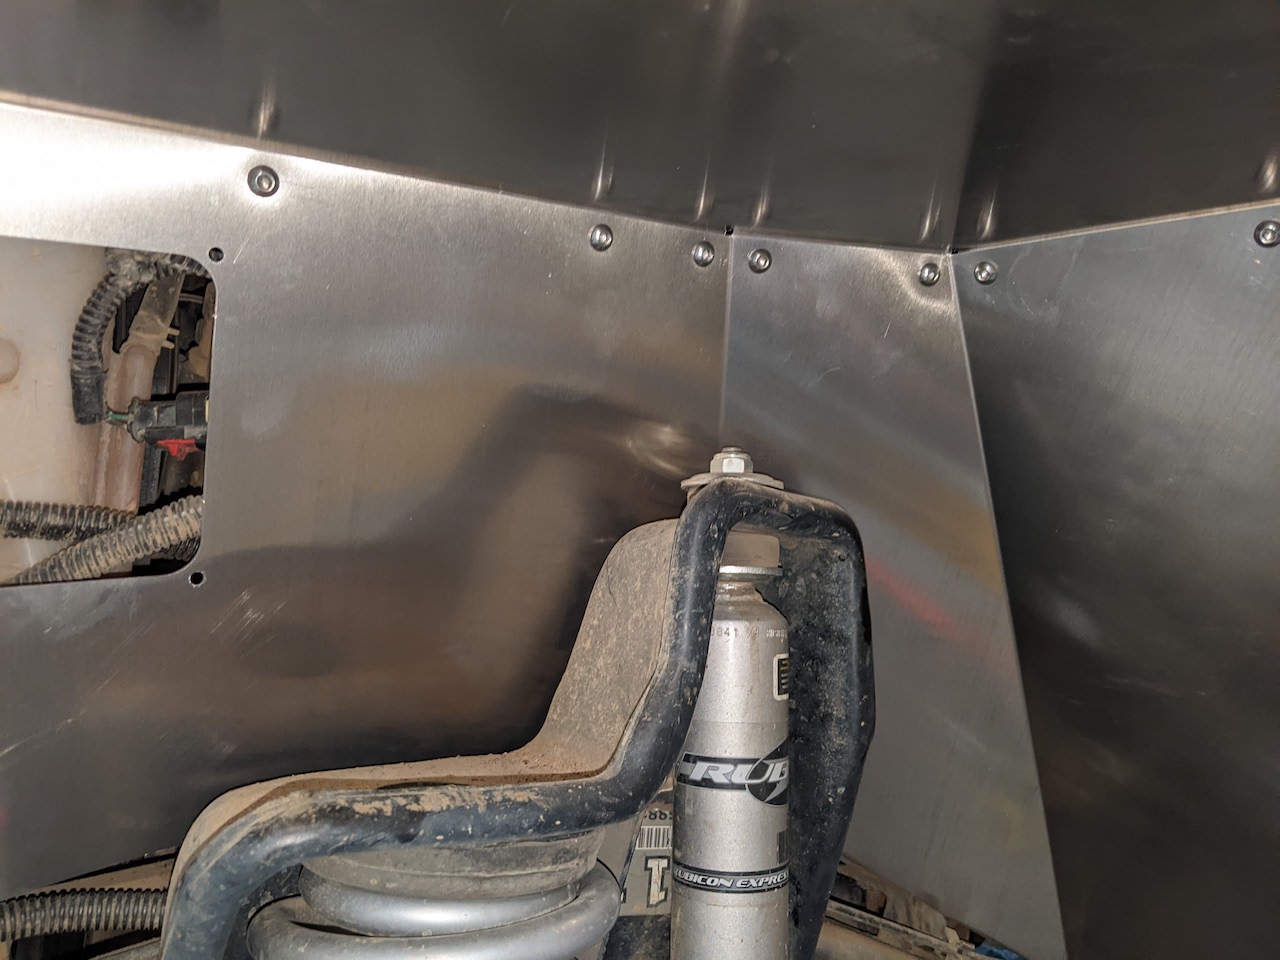
This was not described in the instructions, but the product page for the inner fenders mention they are “not trimmed for any specific suspension” and also “oversized for body lifts.” So I ended up cutting large chunks out of them to fit around the factory suspension mounts and to clear brake lines using a jigsaw. To do this, I first fitted the fender, jammed the inner fender into place underneath it until it mostly seats where it should, and traced the outline of what I needed to trim on the inner. After the first cut, it fits a lot better under there, but on both sides I still had to make a lot of adjustment cuts before everything cleared. I did all of this until I had it right before I did the pop rivets to permanently mount the inner to the fender.

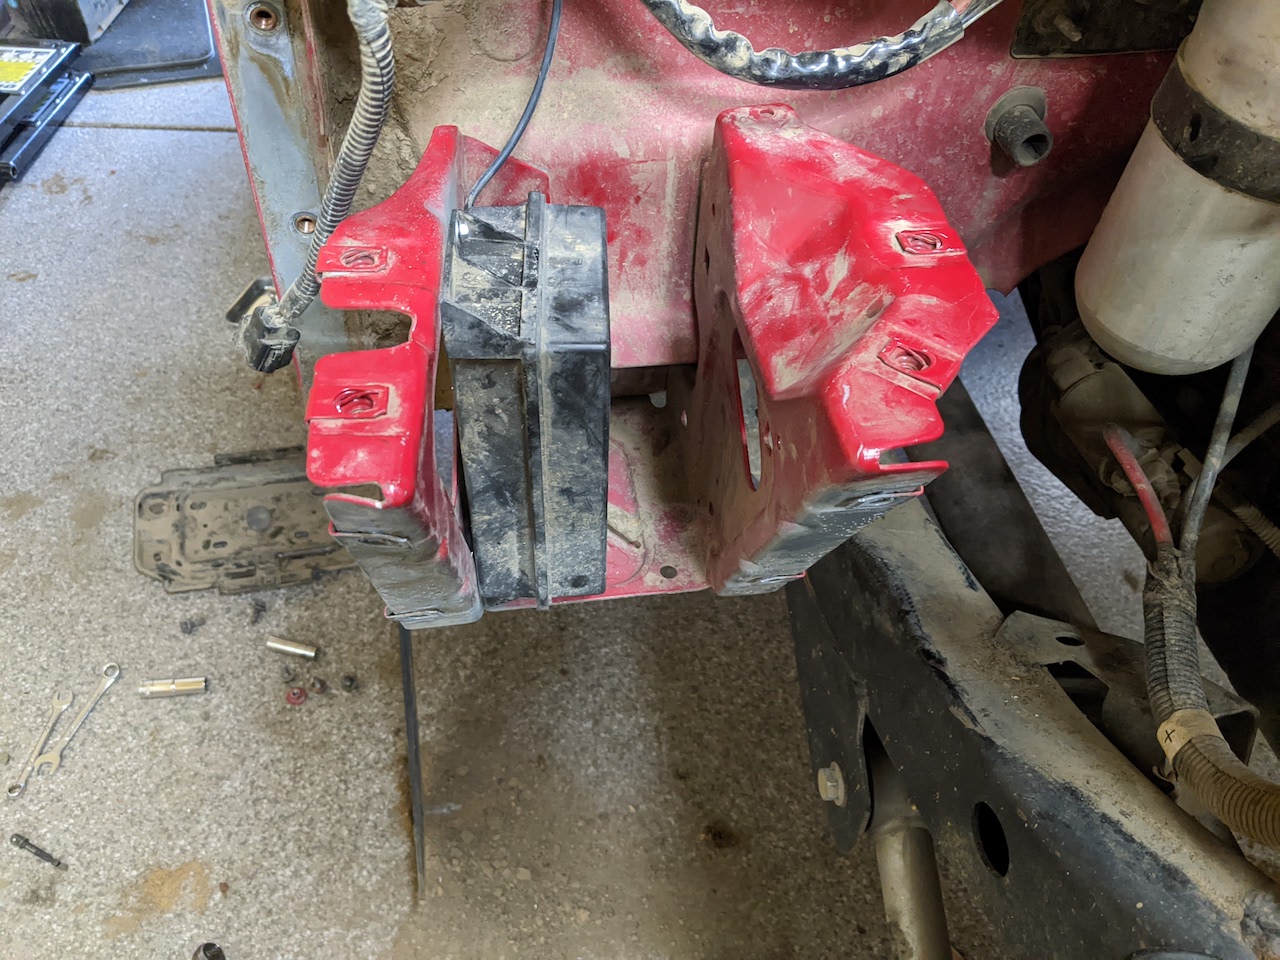
The battery tray on both sides needs to be trimmed just a little to clear the inner fender. The battery mount mostly fits properly, but needs a little force to get it to line up with the holes that are cut in the fender for the bolts. There are no holes pre-drilled in the inner liners for those battery bolts, so I marked them from the back side and drilled them out with the whole thing off the vehicle. The cage nuts on the battery mount were finicky, so I ended up replacing those with M8 serrated flange nuts, which fit better.
The passenger side battery mount has the vacuum reservoir underneath it mounted to the fender. I drilled and mounted it sideways to the battery mount itself to avoid having to mount it to the new inner fender.
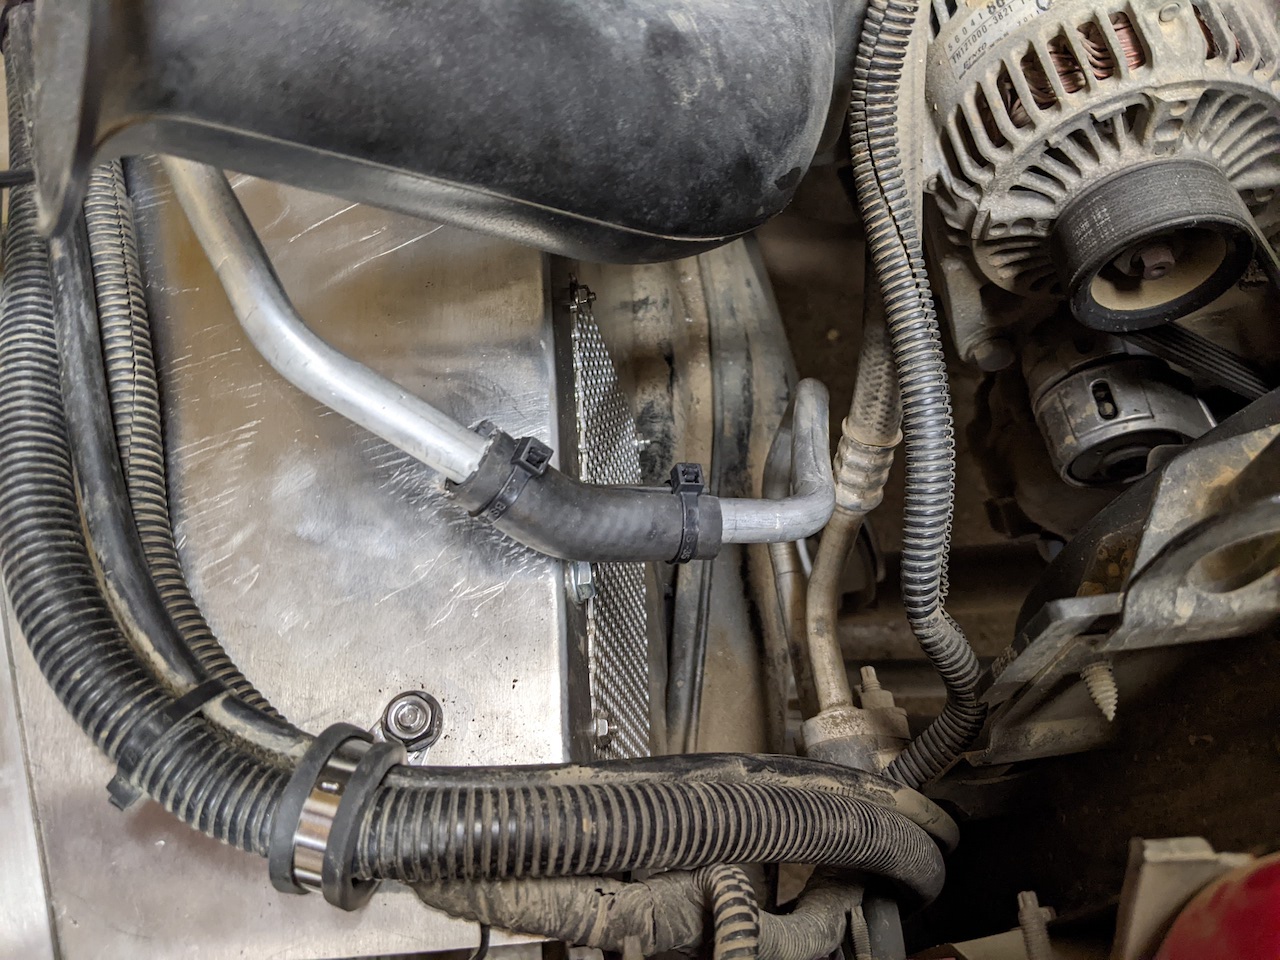
On the passenger side, the AC liquid line is very much in the way of both removing the stock fender and fitting the new inner. I was extremely hesitant to mess with this, but there was no other way. Very gentle pressure with rags in hand made enough room to clear the old fender for removal, and then bending it down to meet the new fender after the fact. Once I did, I zip-tied some fuel hose around the line to give it some protection from rubbing on the corner of the fender.
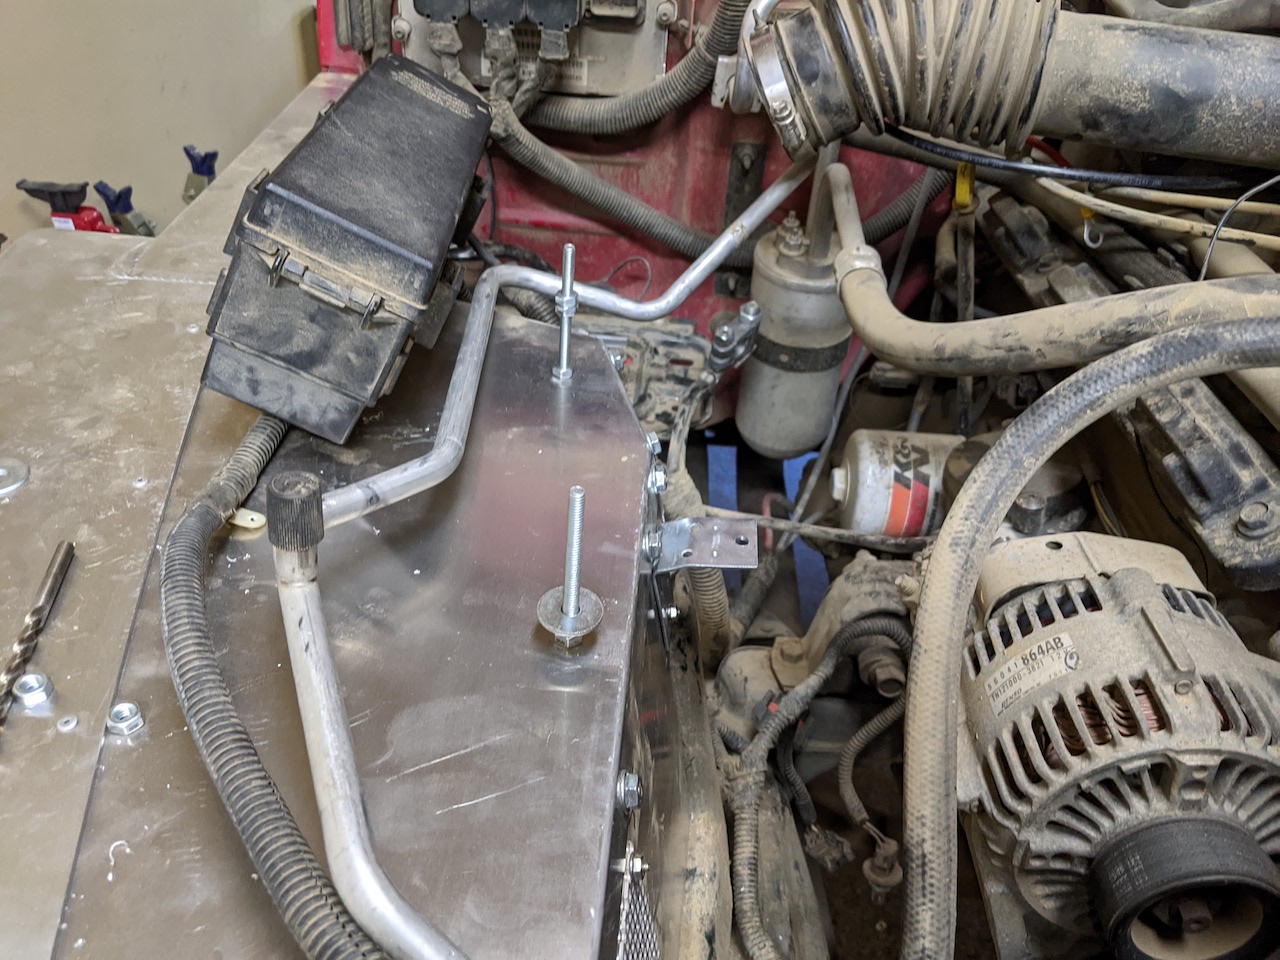
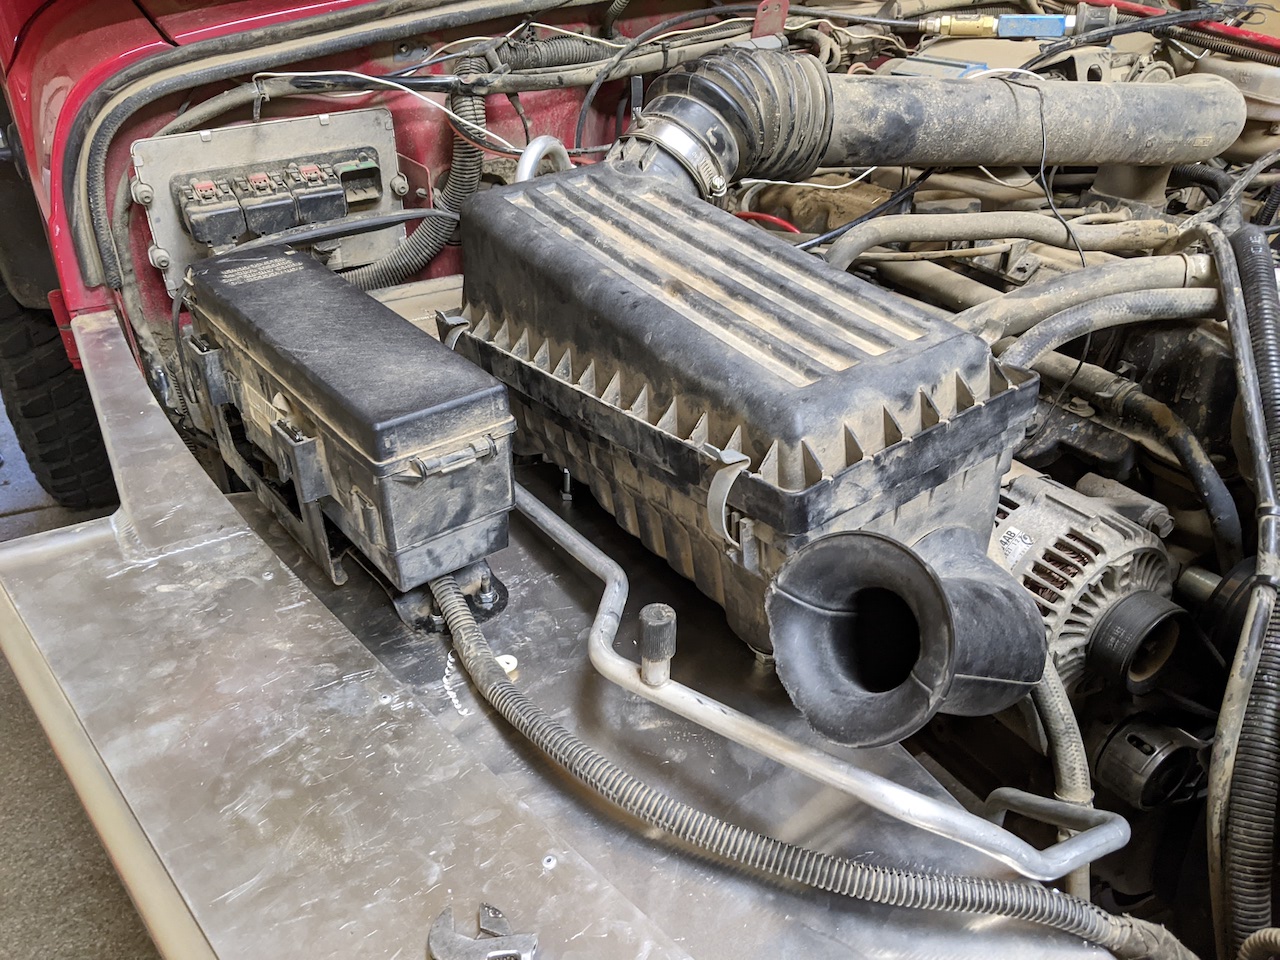
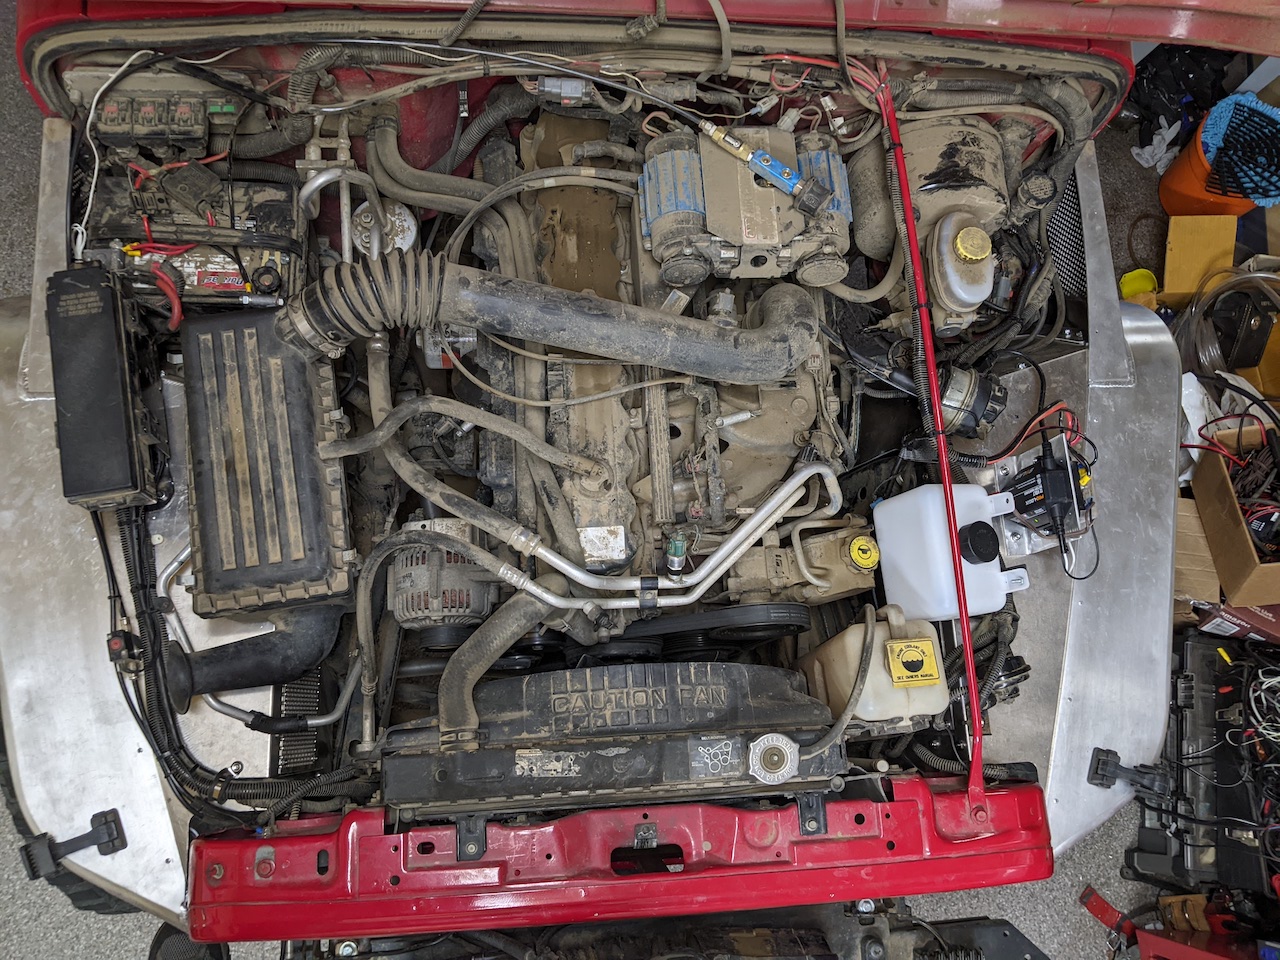
The stock air box does not have a flat bottom, so it does not easily mount to the new fender. I ended up mounting it on long 1/4-20 bolts coming up through the inner fender using the stock rubber-bushing-ed holes. 1/4-20 nuts on the underside with fender washers provide support and nuts on the inside to keep it in place work well. I used a simple angle bracket on the inside vertical face of the fender for the third bolt. This works and lets me angle the air box just enough to clear the hood (just barely) when closed. I had to remove the passenger side radiator support rod to do this, but with the new sturdy fenders, that thing was definitely just for show.
The factory fuse box bracket is easy to bend to fit the new fender and bolt into place with the factory bolts (and some M6 lock nuts).
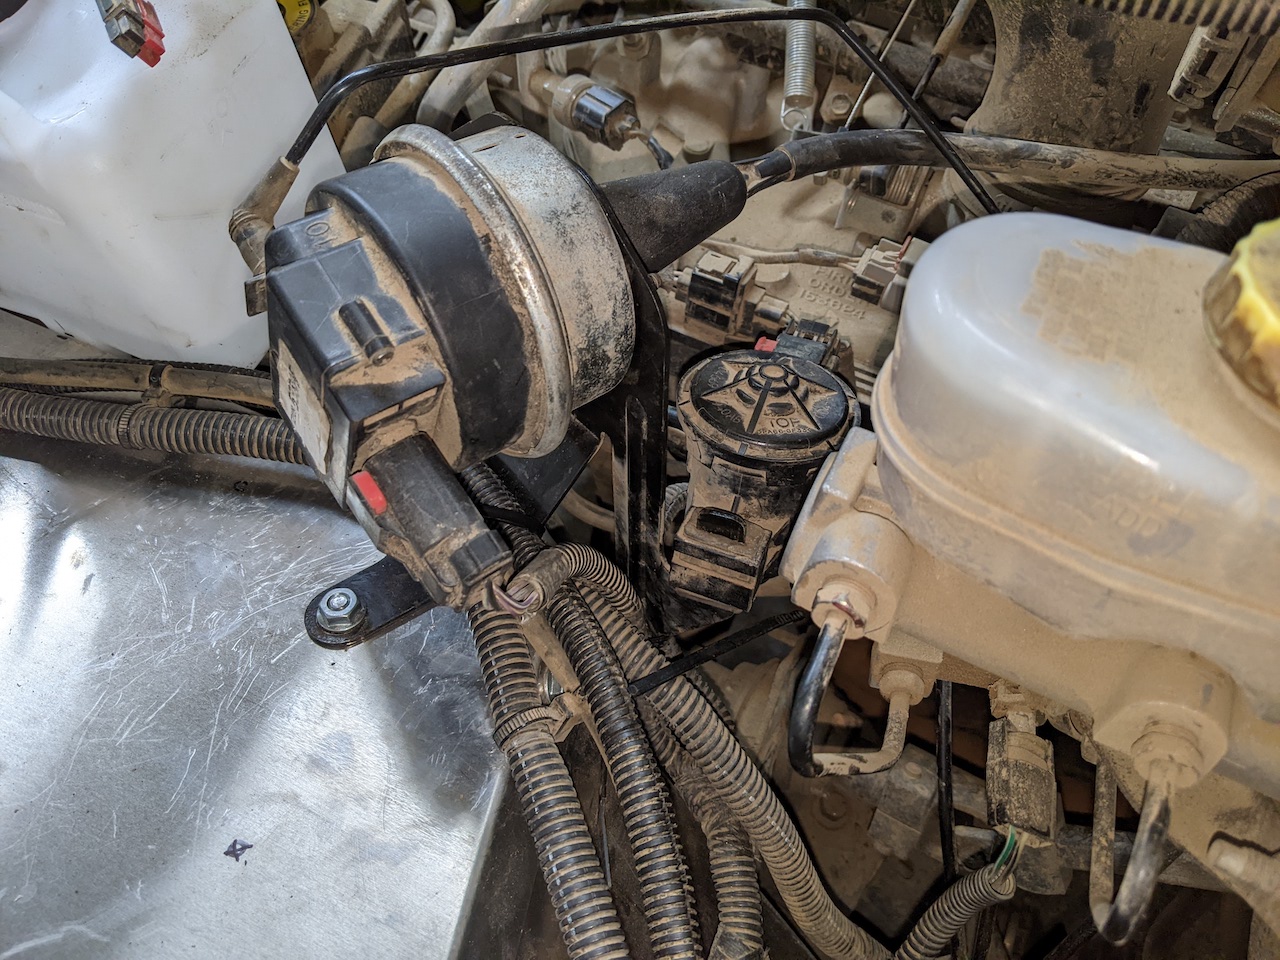
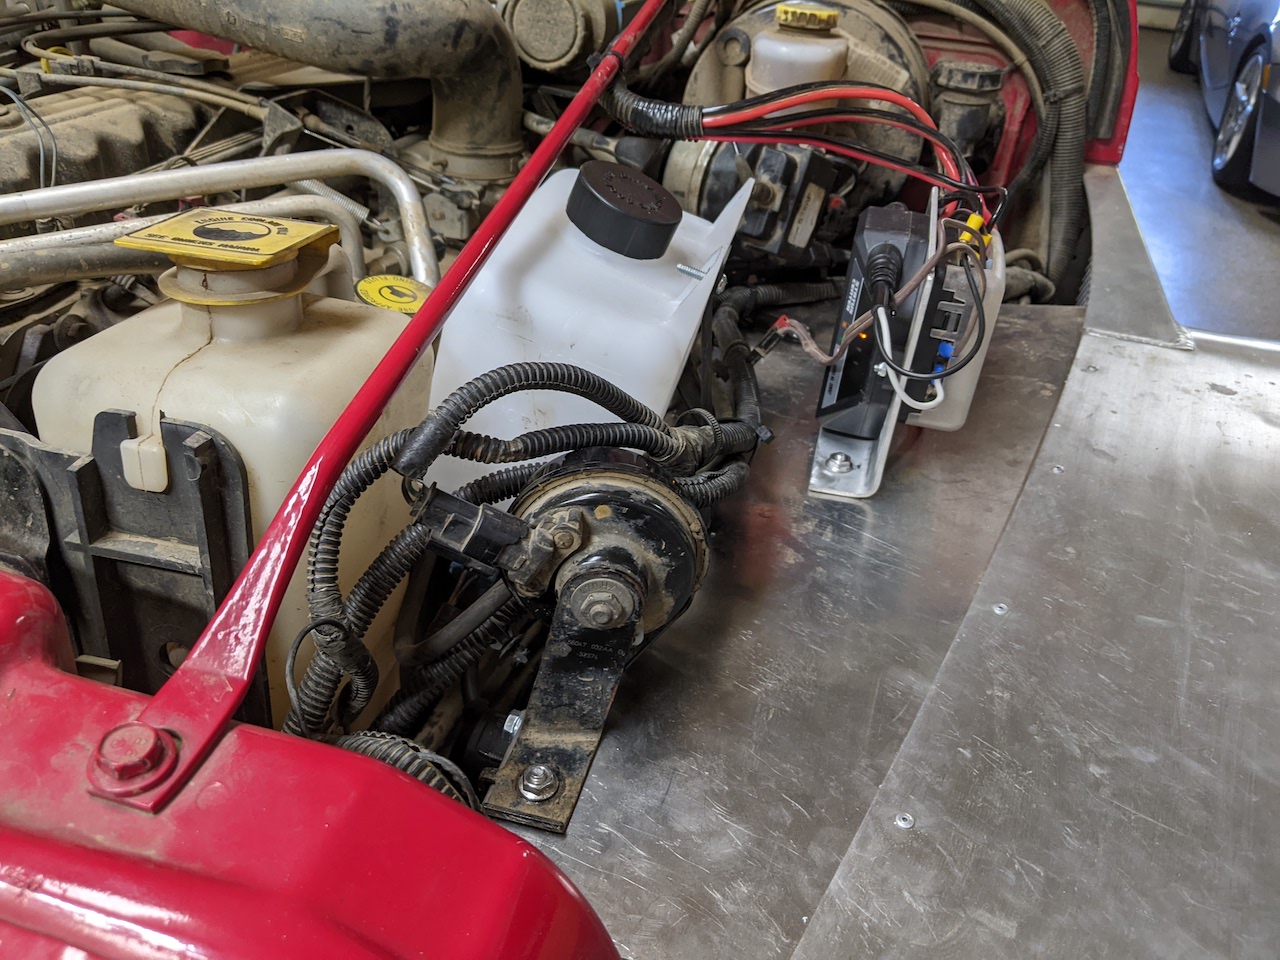
On the driver side, I had the cruise servo, horn, washer bottle, and an auxiliary fuse box to remount. The cruise servo again was just a matter of bending the stock bracket until all three tabs could be located on the fender and bolted in. The horn is a single bolt and similarly easy.
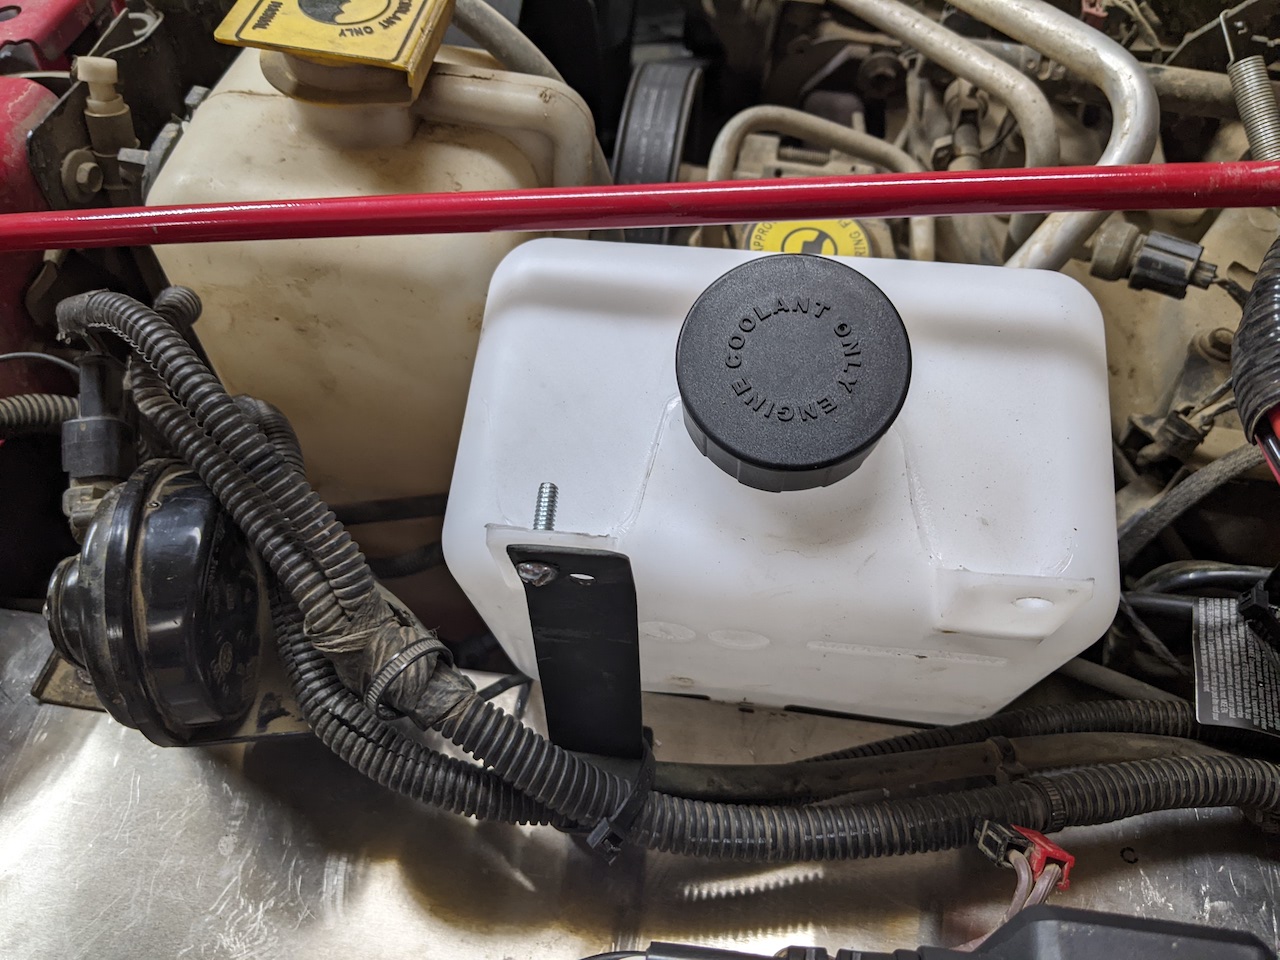
The washer bottle was a little less easy. Mounting it underneath the brake master cylinder would be a good option for most people, but I had already relocated my axle locker pumps there. I used a Dorman 603-001 reservoir bottle, which was a decent size and just fit when mounted on top of the fender at a slight angle. I made a cheesy bracket to hold it in place and it’s fine. The two washer pumps (for the windshield and back glass) can be drilled into the bottom in opposing orientations and I haven’t seen any leaks.
I made a simple bracket for my auxiliary fuse block to keep it upright as I expect water will be streaming in past the fenders now and didn’t want it to sit in the fuse contacts long-term. The horn is a single-bolt indexed bracket which required no modification to bolt to the fender:
Horn mounted
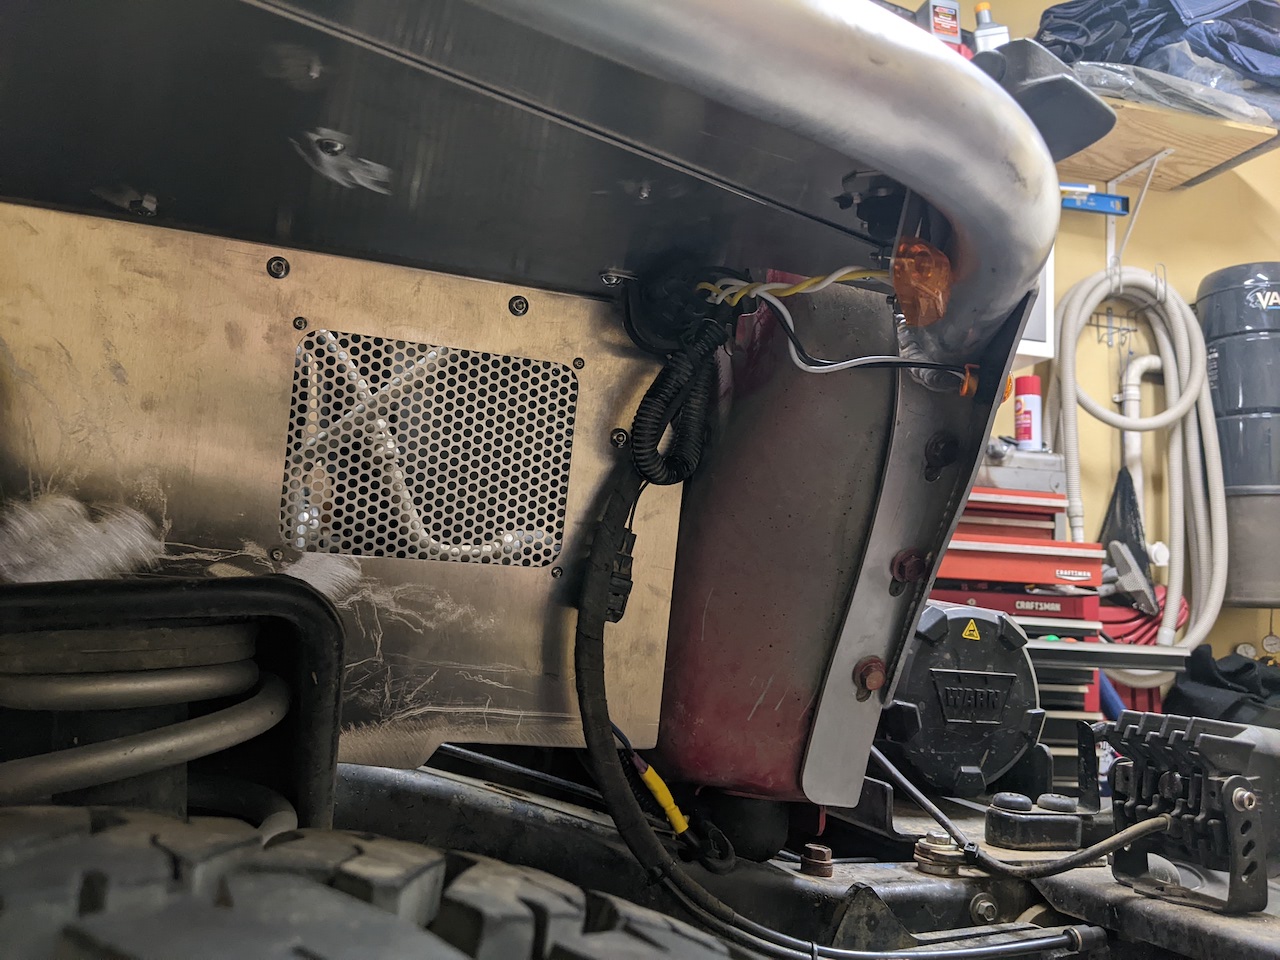
I got the replacement LED light package from GenRight as well. I opted to avoid the diode-and-resistor arrangement to replicate the incandescent side marker behavior and simply wire up dedicated turn signals and side markers. I used three-pin WeatherPack connectors on both sides so I can separate them if I need to remove the fenders later. The wiring and these connectors are tucked up under the top corner of the fender and secured with a rubber-lined cable clamp bolted to the fender. I re-used the factory fog light plug with the “christmas tree” stuck in one of the holes in the inner fender.
Most of the above was summed up in the instructions with a succinct “simply bolt all the underhood stuff to the new fenders” statement. A bit misleading.
So in the end, I think everything went fine. Way more work than I was expecting, but not more than I was willing. I wish the instructions were available on the product website, I wish they matched the actual product, and I wish they said even as much as “you will have to custom mount everything under the hood, so beware.” I get that this is a little more like “pieces of fenders that can be assembled to a finished product” but I’d at least like to know ahead of time that nothing is pre-drilled and is a little more of a “choose your own adventure” … adventure.